Next.js Framework
Why Next.js?

Next.js is a React framework - an extension of React - that provides features such as:
- routing
- server-side rendering
- backend API support
- performance optimizations for images, prefetching, etc.
Next.js streamlines building a full-stack application. On the front-end, it provides
file-based routing so you don't need to set up React Router manually. Next.js also
lets you setup endpoints inside the same project using /api routes. It also provides NextAuth
for authentication.
use client
Pages which serve information and do not involve user interaction are more effeciently rendered on the server. Server-rendered components are the default in the App Router. Client components enable the use of client-side user interaction, event listeners, and hooks, such as useState and useEffect, which are essential for dynamic and interactive client experiences. To enable client-side features, include at the top of the component:
'use client'
When to use Client Components:
- When you need to use React Hooks like useState, useEffect, or useContext.
- When you need to handle user interactions (e.g., clicks, form submissions).
- When you need to access browser-specific APIs (e.g., localStorage, window).
- When you need to manage client-side state or perform client-side data fetching.
By strategically using Client Components alongside Server Components, developers can optimize performance by offloading as much work as possible to the server while still providing rich, interactive user experiences.
App Router
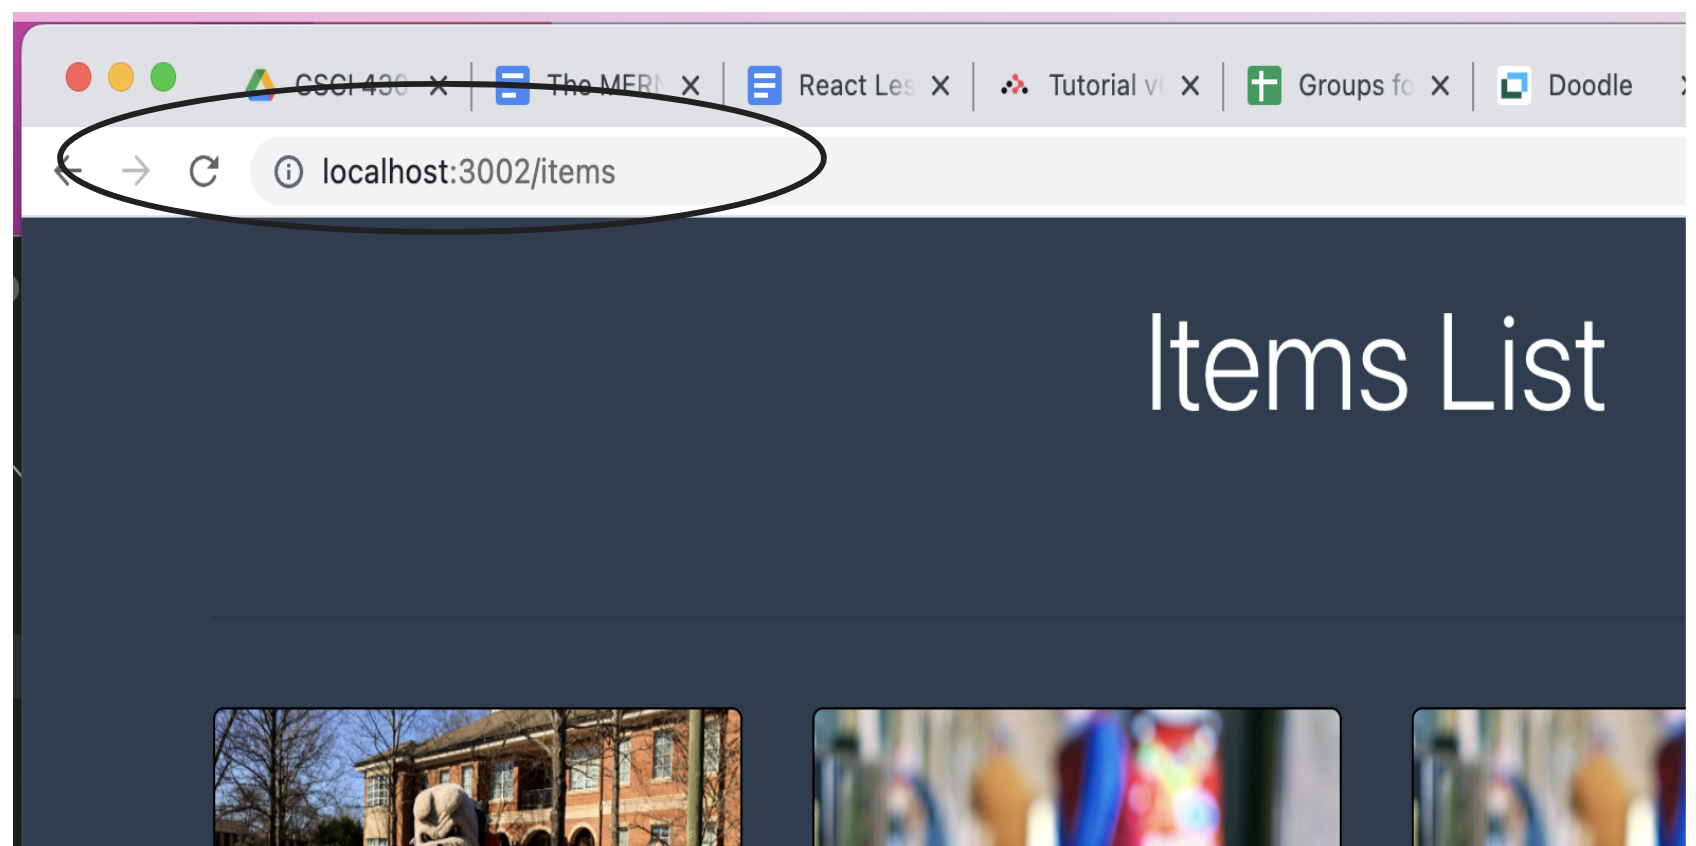
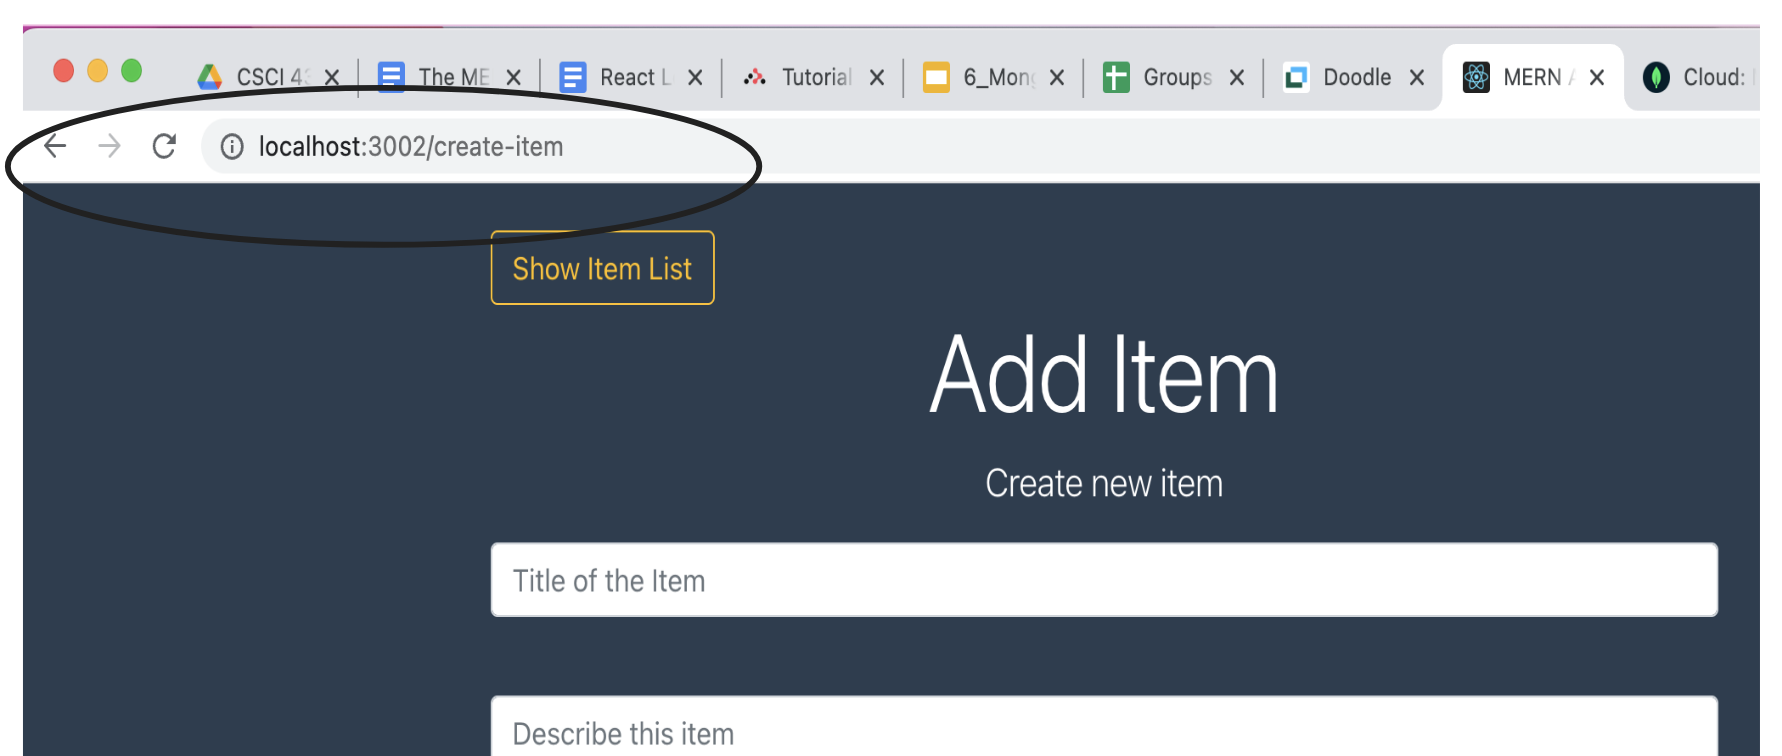
When a React app loads, it fetches the HTML document and then React dynamically manages the DOM, updating the rendered view. So far all the views are only reachable from one url. How can we change that?
You have probably noticed that many apps can provide a direct link to a specific view of the app. We can build apps that render through one html template but allow multiple urls to reach individual views.
This is known as client-side routing. Nextjs includes App Router to implement client-side routes.
App Router is a file-system based router that works in the app directory where:
- folders define routes.
- files create route segments.
pages
A page is UI that is unique to a route. You define a page by default exporting a
component from a page.tsx file. For a Next.js project setup, the root ( / ),
home page is created with the page.tsx file in the app directory.
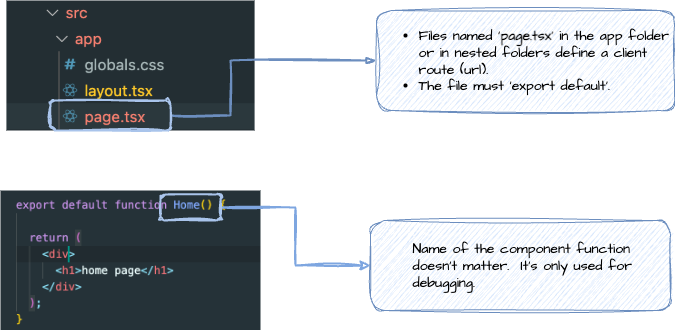
To create other client routes, create a new folder that bears the name of the route
and create a page.tsx inside it. For example, to create an /about route to render the about us view:
- create the folder app/about.
- create a page.tsx file in app/about that renders the about us view.
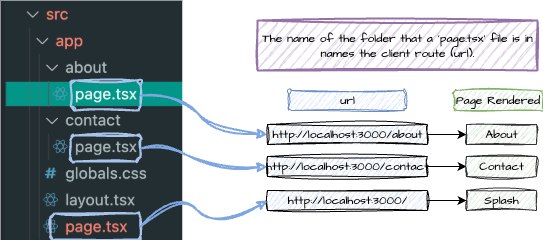
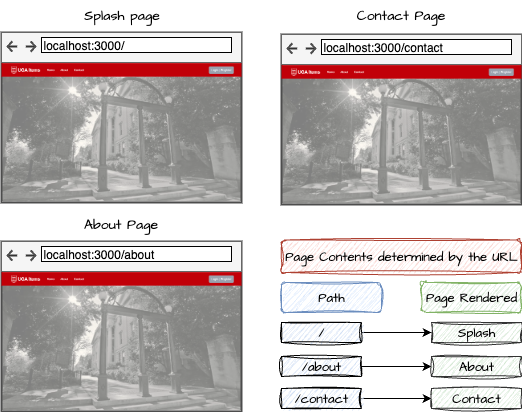
See the folder and file setup above for the root /, /about and /contact routes. Each
route renders the content in page.tsx.
not-found
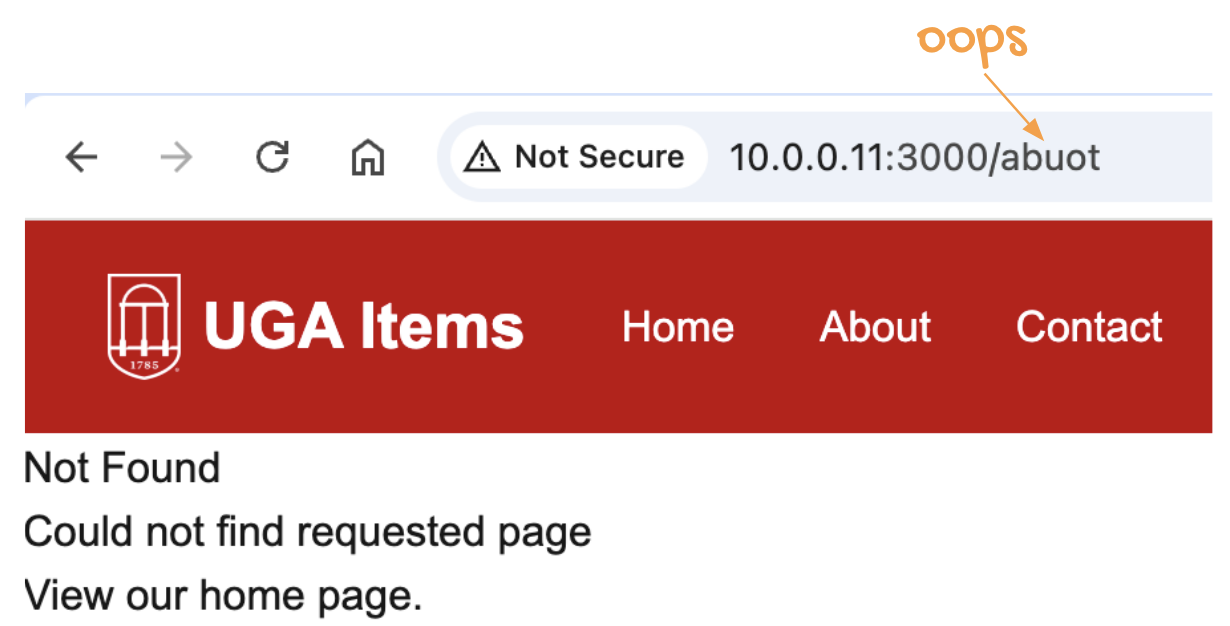
To handle urls that do not match a client route and prevent a 404 not found error, create a not-found.tsx component in the app.
<Link> component
<Link> is a built-in component that extends the HTML <a> tag to enable
client-side navigation between routes. Using the <Link> component:
- enables fast transitions between pages without a full browser refresh
- Next.js automatically preloads the linked page making the transition faster
To use <Link>:
- import Link from next/link
- pass an href prop to the component
import Link from 'next/link';

export default function Navigation() {
  return (
    <nav>
      <ul>
        <li>
          <Link href="/about">
            About Us
          </Link>
        </li>
        <li>
          <Link href="/contact">
            Contact
          </Link>
        </li>
      </ul>
    </nav>
  );
}
dynamic routes
Not all routes are static - known in advance. Sometimes routes are created from dynamic data. This happens when we dynamically add elements that take on a unique id. To create routes from dynamic data - routes that we do not know in advance - you can use dynamic segments that are filled in at request time.
Consider a blog example. You create a new blog post which gets added to the blog when you submit the form. You want to provide a client route to view your new post.
This post wasn't known when you created the client routes with static folder names and page.tsx files.
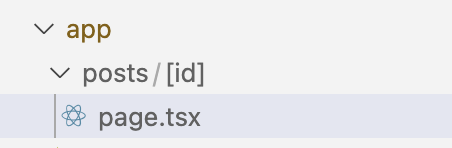
With a dynamic segment, you create a route to your new post that was dynamically added to
the blog. The blog would include the following client route where [id] is the
dynamic segment:
app/
└── posts/
     ├── page.tsx          // /posts
     └── [id]/             // dynamic route folder
          └── page.tsx     // /post/123, /post/abc, etc.
-
In App Router, dynamic routes are created by wrapping the folder name in square brackets
[id]. -
Any URL like /posts/5 or /posts/abc will automatically render this component.
params
Dynamic segments are provided via the params prop in server components and via the useParams hook in client components.
client: useParams
Client Components ('use client') read the dynamic segment with the useParams
hook provided by next/navigation. useParams returns the current
route params from the URL on the client.
'use client';

import { useParams } from 'next/navigation';

export default function ClientView() {

  const { id } = useParams<{ id: string }>();

  return (
    <section>
      <h2>Client Component</h2>
      <p>Item id: {id}</p>
    </section>
  );
}
server: params Promise
With recent versions of Next.js, the params object is passed to server components
as a Promise. We must make the component async and await params.
export default async function PostPage(
    { params}: { params: Promise<{ id: string }>})
{
  const { id } = await params;
  ...
}
or typing the props:
type PageProps = {
  params: Promise<{ id: string }>;
};

export default async function Page({ params }: PageProps) {
  const { id } = await params;
  ...
}
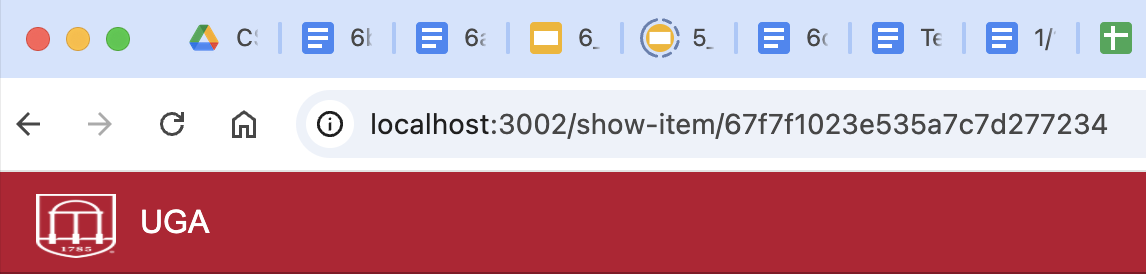
- For /posts/7, the unwrapped id will be "7".
This is especially useful when retrieving data from an API or database based on the ID.
userRouter navigation
The useRouter() hook allows you to programmatically change routes between
client components. Use useRouter() when you want to navigate programmatically in
response to an event—not just by clicking a <Link>.
Example use cases:
-
After submitting a form → redirect to another page
-
After deleting the item in the view → take user to another page
-
On Log out → redirect to login page
Here's an example redirect on signup:
"use client";
import { useRouter } from "next/navigation";
import { useState } from "react";

export default function SignupPage() {
  const [name, setName] = useState("");
  const router = useRouter();

  async function handleSubmit(e: React.FormEvent) {
    e.preventDefault();

    // code to send login data to an API

    // After successful signup, navigate to another page
    router.push(`/welcome?name=${name}`);
  }

  return (
    <form onSubmit={handleSubmit} className="space-y-4">
      <h1 className="text-xl font-bold">Sign Up</h1>
      <input
        type="text"
        value={name}
        onChange={(e) => setName(e.target.value)}
        className="border px-2 py-1"
        required
      />
      <button type="submit" className="bg-blue-600 text-white px-4 py-2">
        Submit
      </button>
    </form>
  );
}
Tip: Use the <Link> component to navigate between routes unless you have a
specific requirement for using useRouter.
| Part | Purpose |
|---|---|
"use client" | Required because useRouter() is a client-side hook. |
useRouter() | Gives access to navigation methods like .push(), .replace(), .back(), etc. |
router.push('/welcome') | Navigates to another page programmatically . |
Image component
Nextjs provides an <Image> component that extends the HTML <img> element.
<Image> has support for image optimization that allows for resizing and
optimizing images. This avoids sending large images to devices with smaller viewports.
Images are lazy loaded - as they are scrolled into the viewport.
import Image from 'next/image';

const Avatar = () => {
    <Image
        src="/images/profile.jpg"
        height={144}
        width={144}
        alt="My Profile"
    />
}
The Next.js Image component requires:
- both width and height to be set
- the leading
/is necessary for the image path because it tells the browser to look for the image from the root of the website, not relative to the current page’s URL.
Any files placed inside the public/ folder in Next.js are served directly at the root of the site. So public/images/profile.jpg becomes accessible at /images/profile.jpg.
The leading / means “start from the website root,” which ensures the correct absolute path is used, no matter what page or route you’re currently on.
In Next.js, you must explicitly authorize (allow) external images before using them
with the <Image> component. This is required for security and performance reasons.
If you try to load an image from an external URL that isn’t authorized, Next.js
will throw an error.
You authorize external image sources in the next.config.js file, like this:
module.exports = {
  images: {
    remotePatterns: [
      {
        protocol: 'https',
        hostname: 'images.unsplash.com',
      },
      {
        protocol: 'https',
        hostname: 'example.com',
      },
    ],
  },
};
You must authorize external images in Next.js so the framework knows which remote hosts are safe to fetch and optimize images from, and you do this by listing those domains in next.config.js.